

How to “automatically” export HubSpot data to Excel?
Are you still exporting HubSpot data to Excel manually? Or even do it everyday?
Have you ever wondered if the entire exporting process can be automated?
No more wonder.
We have gone through the laborious journey of looking for a solution that could automatically export HubSpot data to Excel online.
After investing dozens of hours searching all over the Internet, we finally discover a feasible solution.
No need to waste your precious time like us. We will share step-by-step instructions on how to "automatically" export HubSpot Data to Excel.
Moreover, after completing the configuration of the automation, we can also set a periodic schedule for this automation to run such as daily, weekly, or monthly, depending on your work requirements.
Prerequisite:
Ensure that you have a Microsoft OneDrive account so that we can export HubSpot data to Excel online in ondrive.
Step 1: Register a free account
The automation tool we will use is “make.com”, which offers 1000 operations per month for a free account.
Register your free account in link below:
There are various kinds of automation we can perform by using make.com.
For now, we will focus on exporting HubSpot data to Excel.
Step 2: Create a New Scenario
After setting up a free account at Make.com, just log into it and you will see the webpage as below:
Next, click on the "Create a new scenario" button at the top right corner of the screen to launch editing the scenario. (Make.com call each automation program as a scenario)
We will see the blank scenario editing page as below:

Step 3: Add the HubSpot module
In each scenario, we need to click the PLUS button (+) to add the first module.
Let’s click it and and a new window appears at the right hand side.
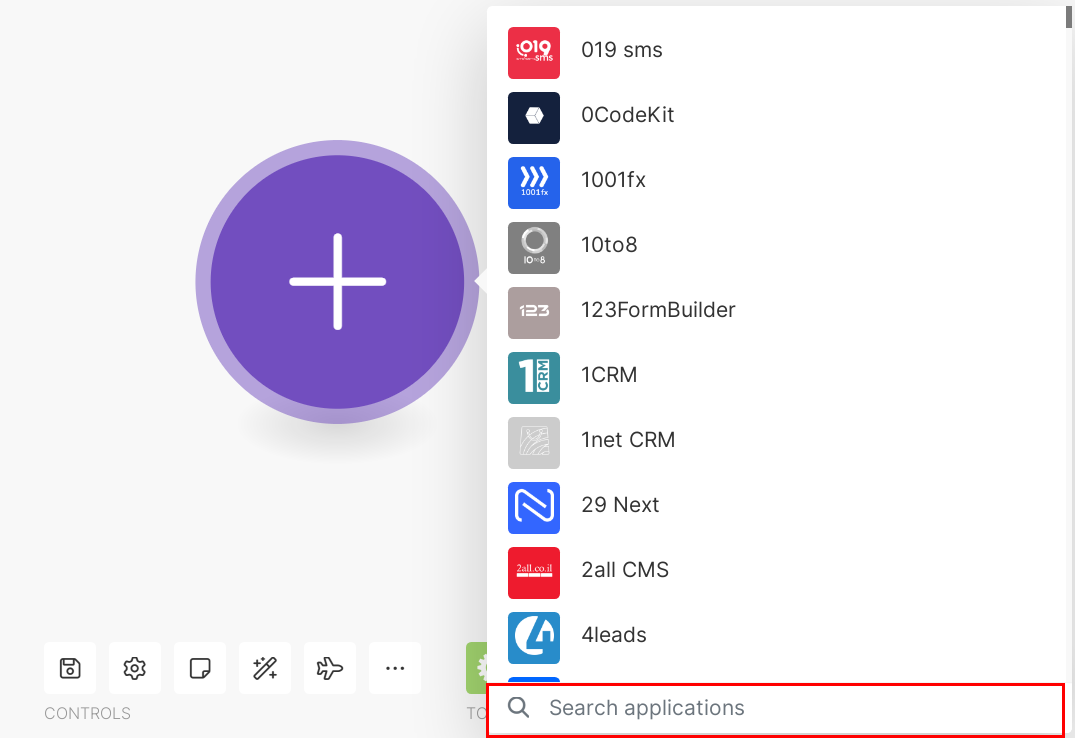
At the bottom right corner of the screenshot above, we will enter “HubSpot” to search for the module of HubSpot. After entering "HubSpot" in the search box, the HubSpot module shows up as below:

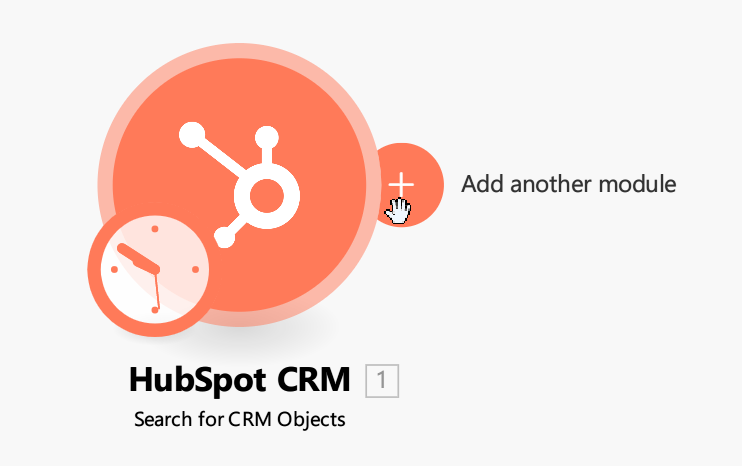
Select the orange "HubSpot CRM" icon and two windows will show up. A video tutorial on the left (we will skip), and a selection list on the right as below:
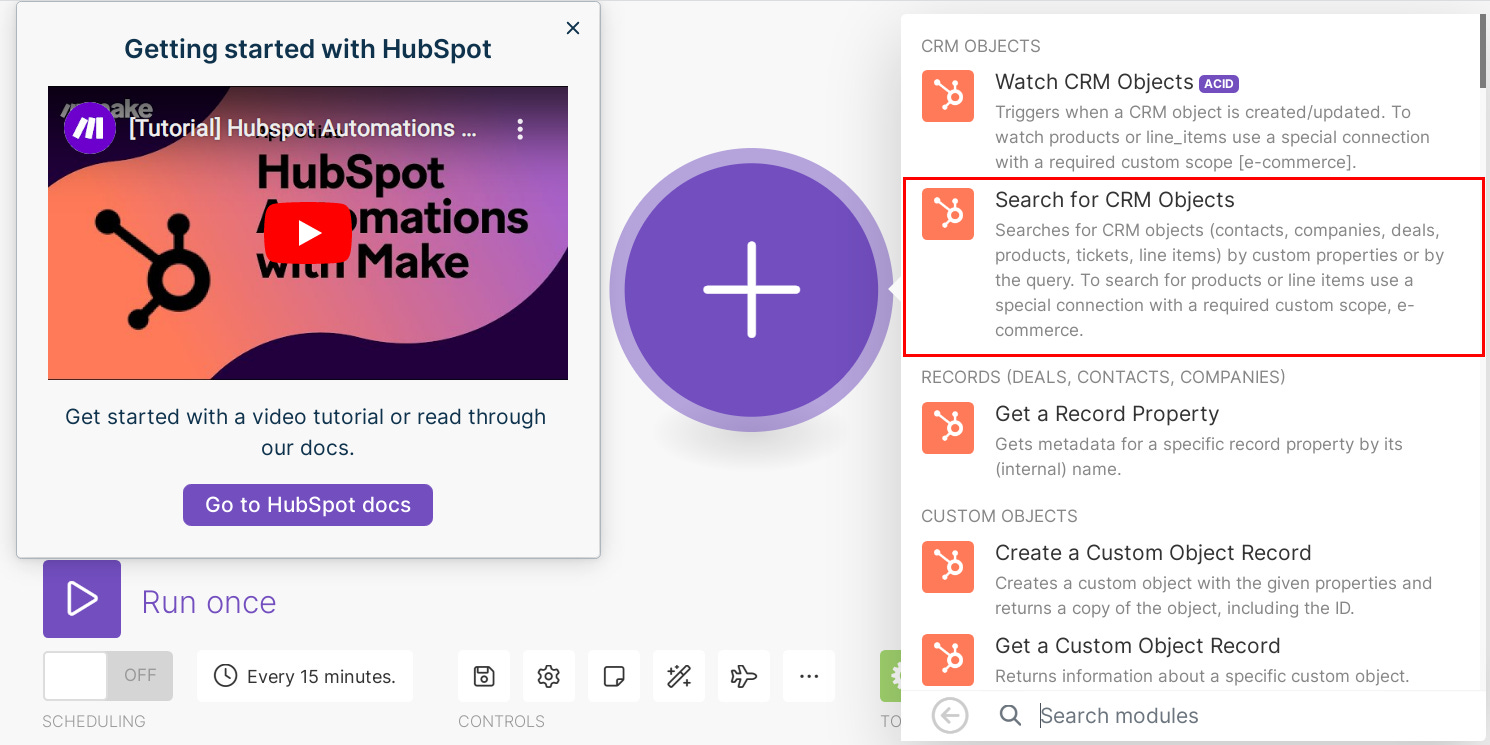
In this tutorial, we’ll use “Search for CRM Objects” shown in the image above as this option provides more flexibility in exporting HubSpot data.
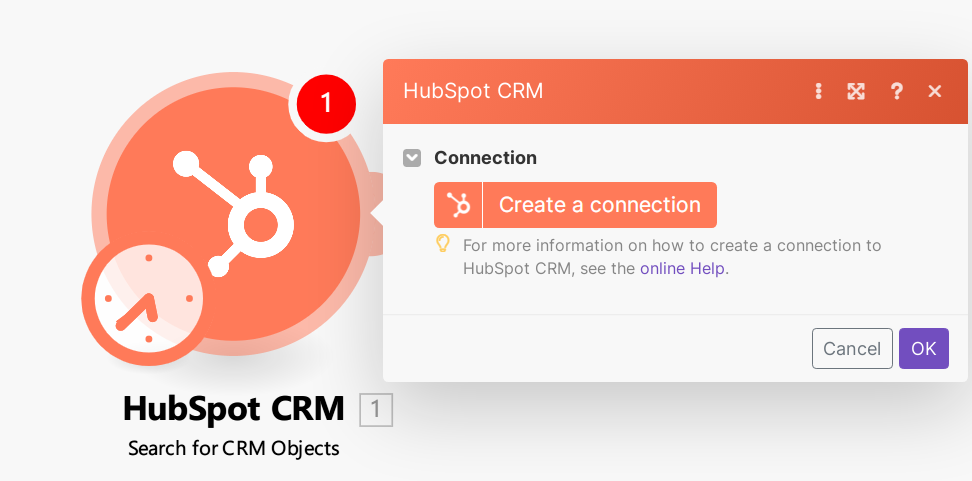
Step 4: Connect with HubSpot
The next step is to create the HubSpot connection. Just click on “create a connection” and follow the instructions on the webpage.
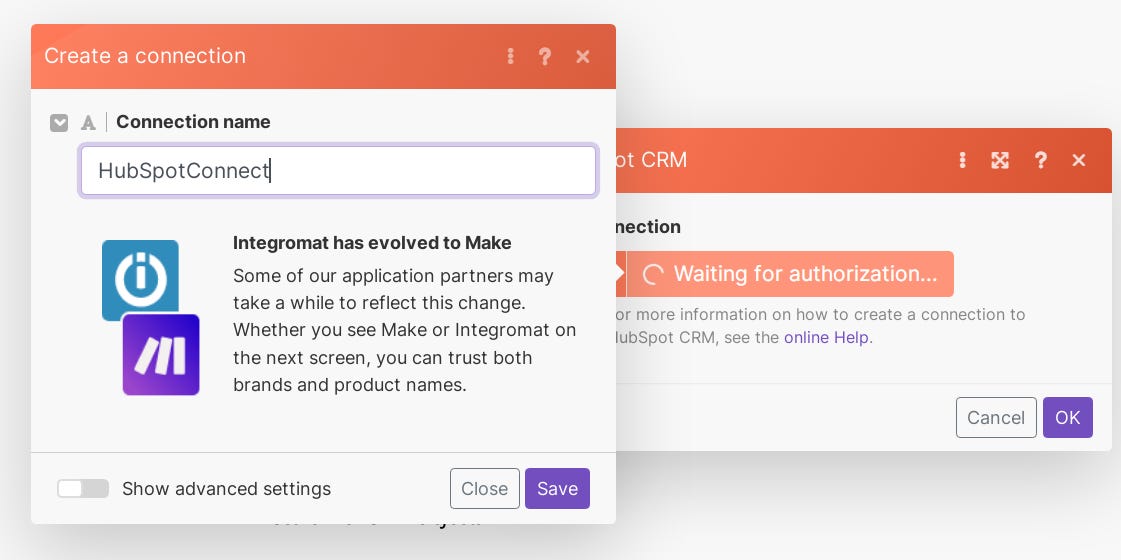

In the preceding screenshot, just click on "sign in to your HubSpot account". After completing the HubSpot validation, we will see the screen below:
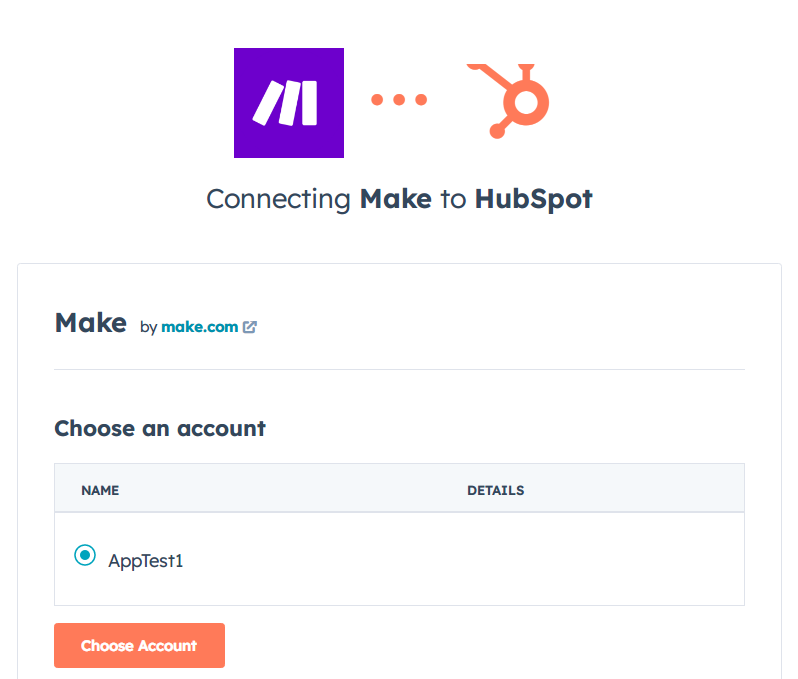
Hit "Choose Account" and it leads us to the next screen.
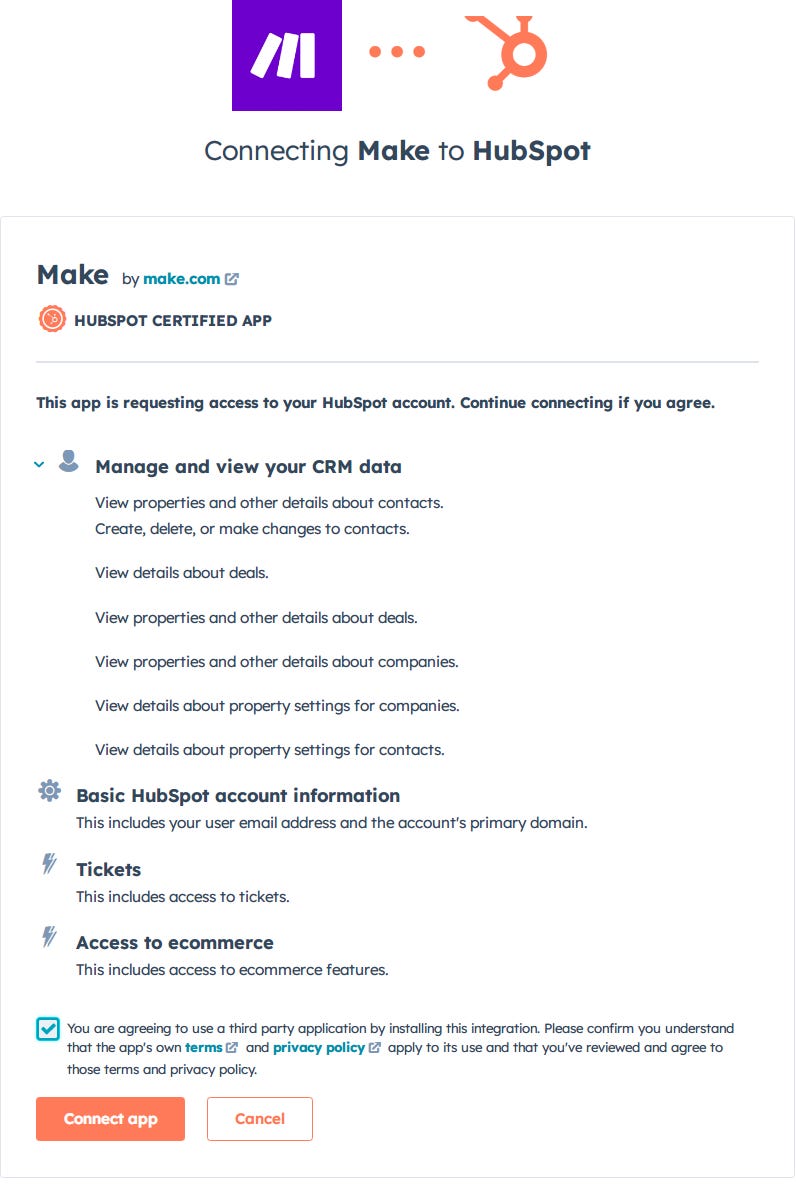
Click "Connect app" to complete the configuration.
Step 5: Select the object type of HubSpot
As we will export company data from HubSpot, we select "Companies" in the dropdown menu of Object Type to Search.

You can also use filter in exporting HubSpot data. To keep things simple, we will skip setting the filter.
Step 6: Add the Excel module and Set up Excel Connection
Move the mouse near the right edge of HubSpot module and a plus button appears as below:
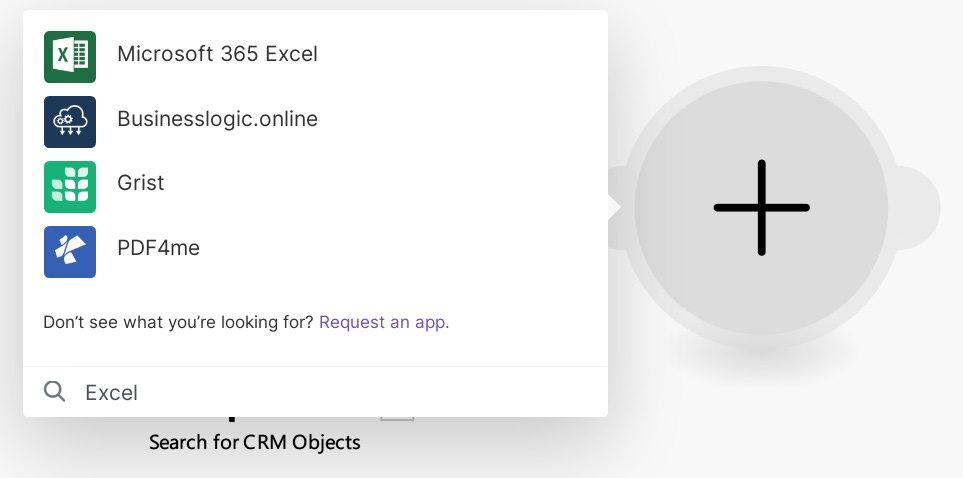
Click on the plus button and search for “Excel” module as shown below:
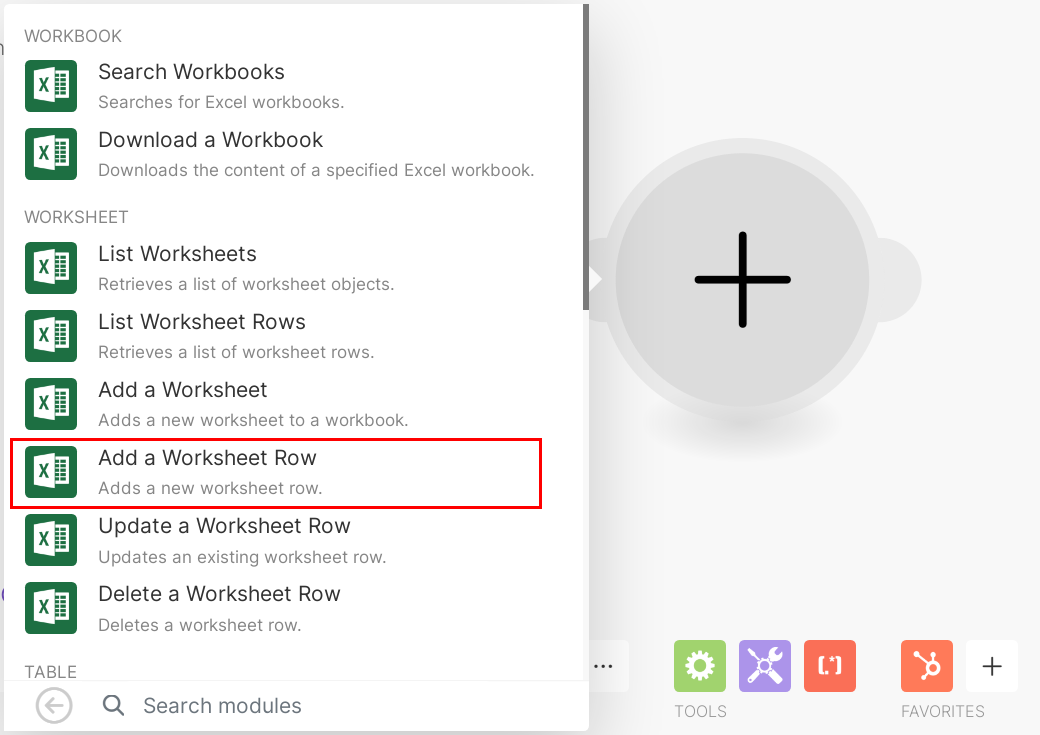
Select "Microsoft 365 Excel", and choose "Add a Worksheet Row".
Now we will begin to set up an Excel connection.
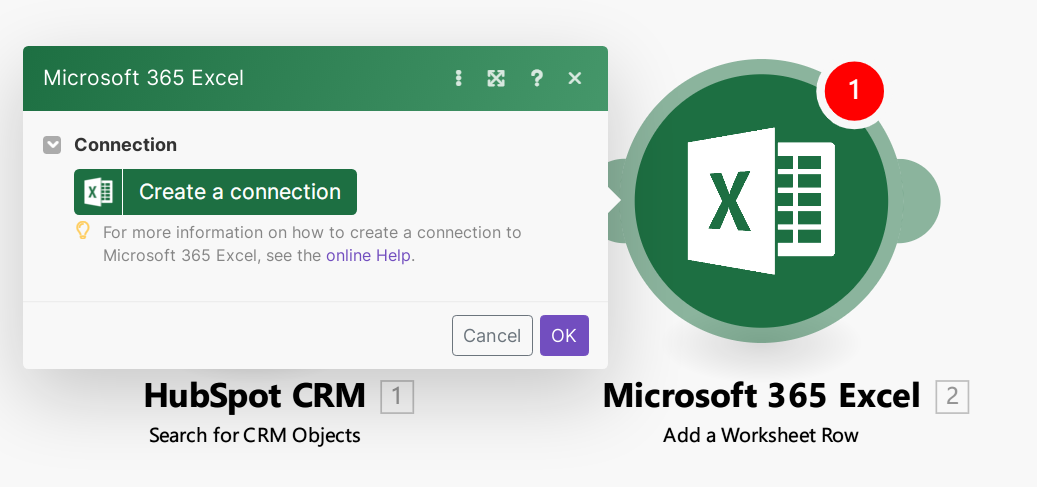
Just follow the instructions on the webpage to complete the necessary configuration for an Excel connection. These instructions are pretty straightforward.
Step 7: Map HubSpot Data to Excel Columns
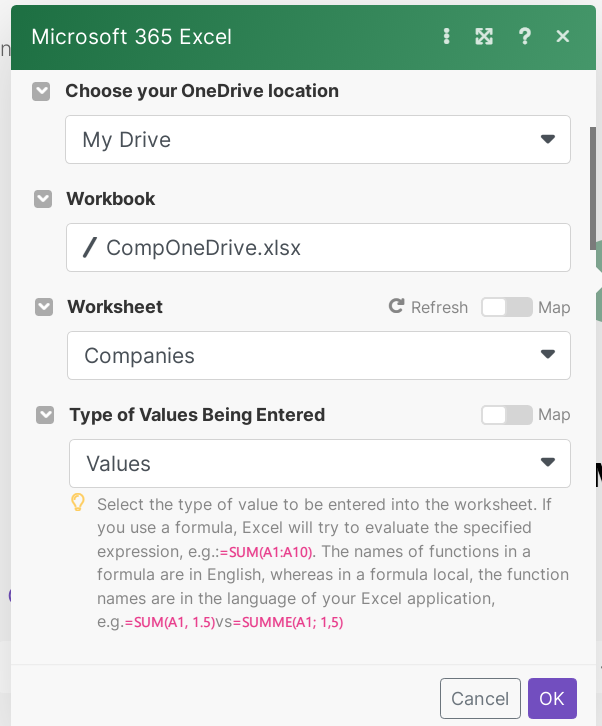
After setting the Excel connection, we will reach the screen below.
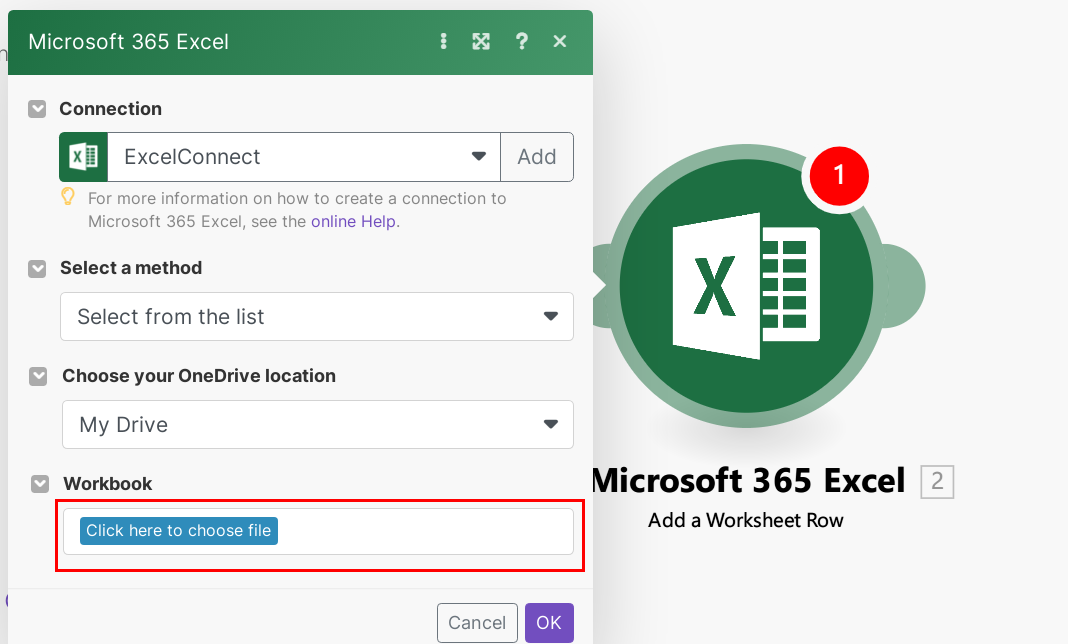
After selecting “Click here to choose file”, we choose the Excel file "CompOneDrive.xlsx", and select the Worksheet "Companies" as the destination for the HubSpot data.
As we export data only, we select "Values" in Type of Values Being Entered.
Scrolling down the Excel module in Make, we can map the HubSpot Data Fields to Excel Columns as shown below.
This may look a bit scary. Hang on and just follow our illustrations.
In the next screenshot, we can just click on a particular item under the HubSpot Properties so that it will be mapped to the column of the destination Excel worksheet.
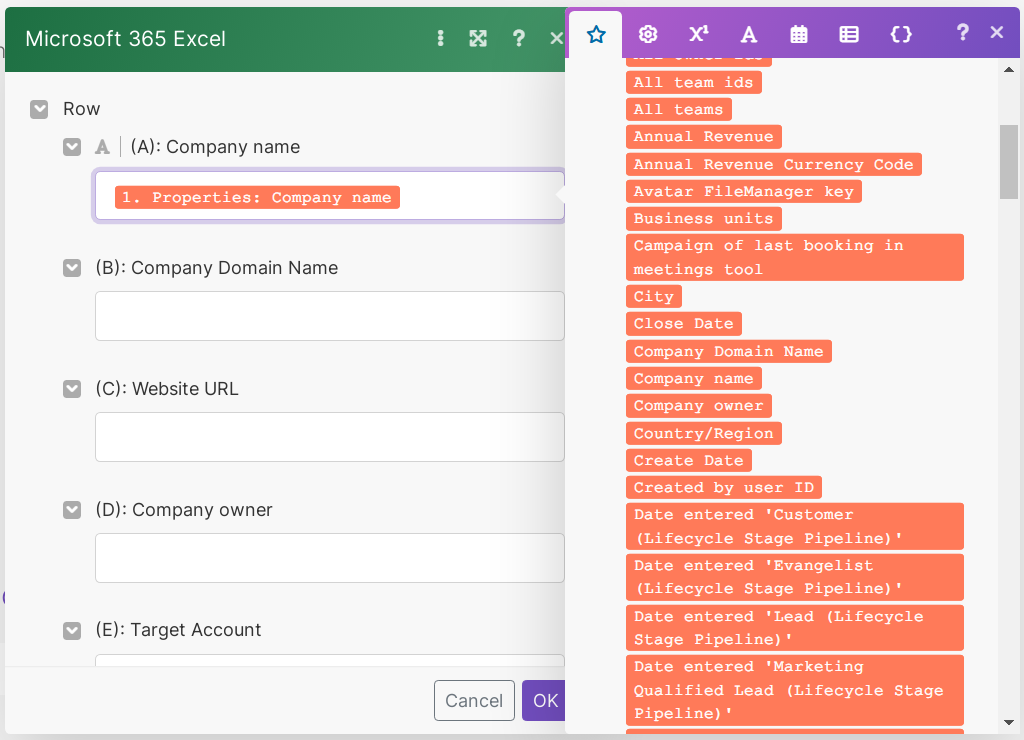
After finishing all mappings between HubSpot properties and Excel columns, click OK button at bottom right corner.
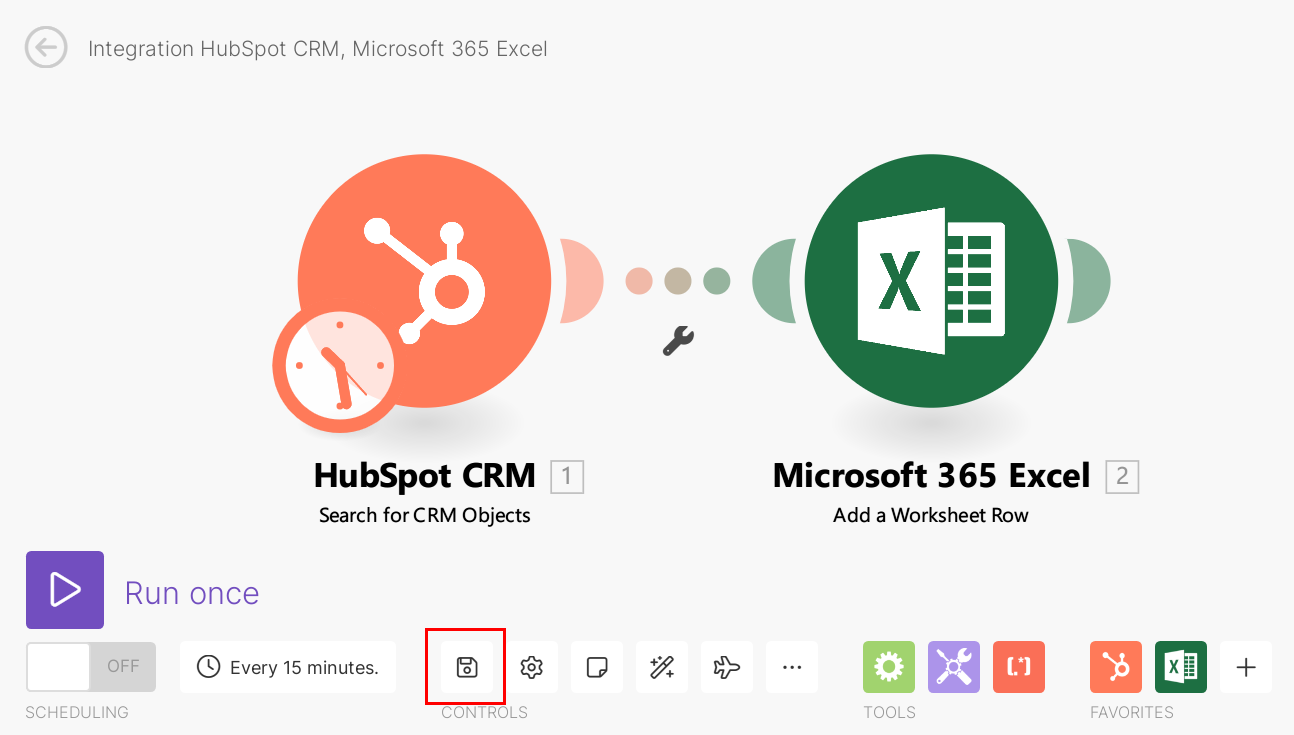
Step 8: Save the Scenario
After going through the preceding settings, remember to SAVE the scenario by pushing the button in red rectangle in the screen below.
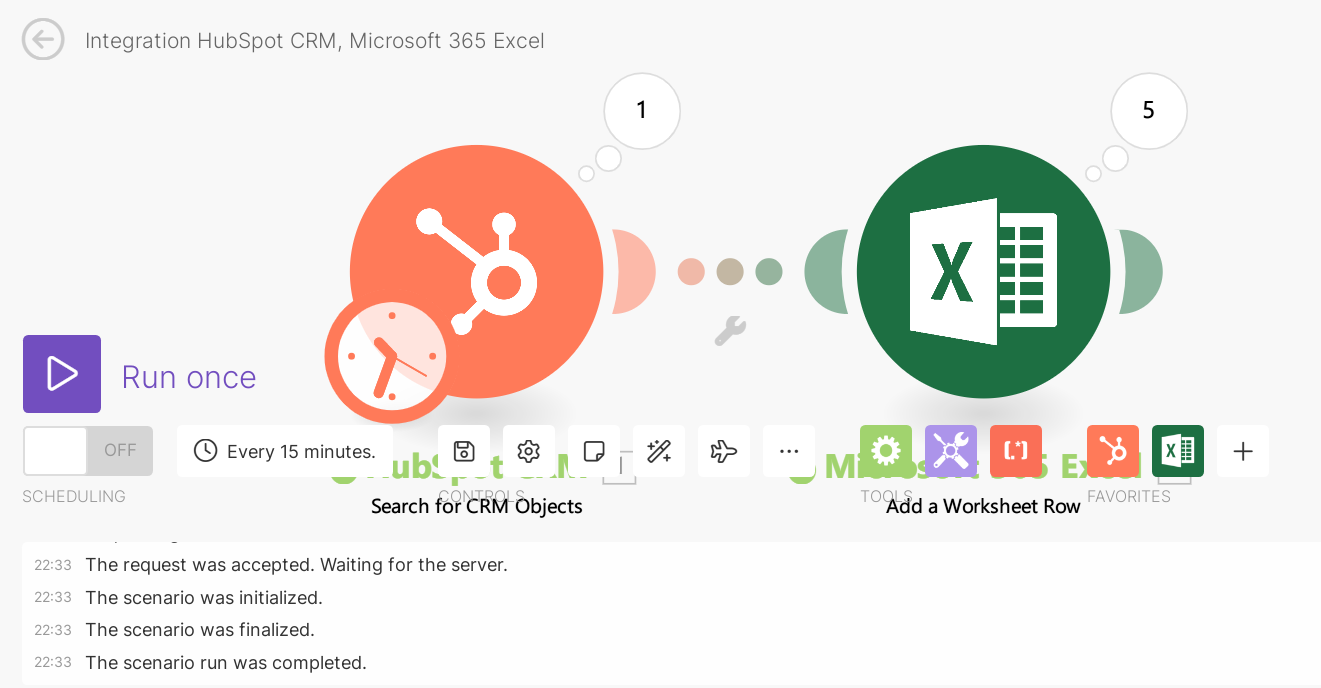
Step 9: Get ready to Run the Scenario
Let’s see how the scenario can perform data automation for us.
Click on the purple button "Run once" near the bottom left corner.

When the scenario is being executed, a message window will pop up at the bottom.
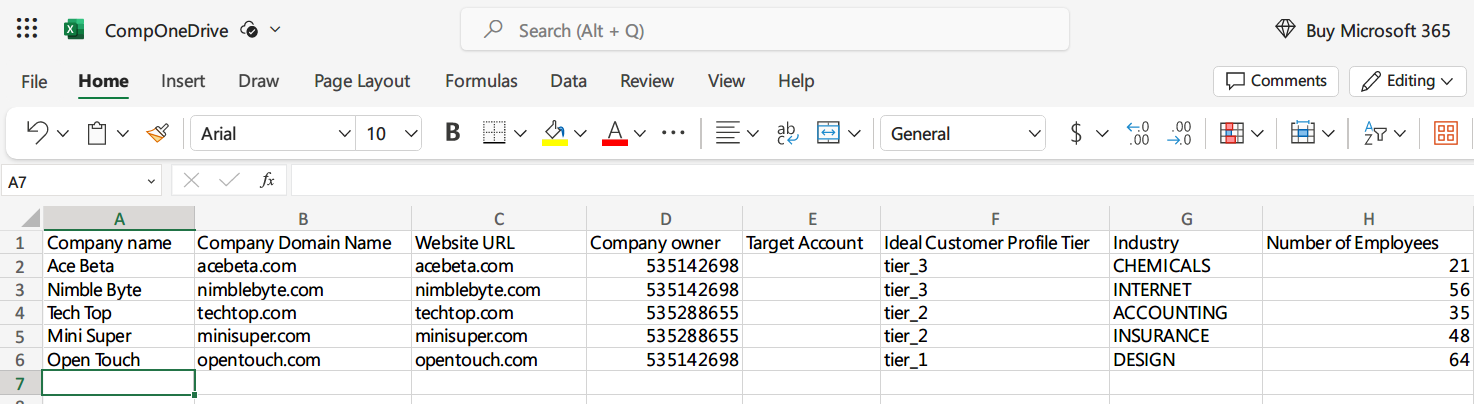
Enjoy the automation reward
After the scenario is completed, the HubSpot data are exported to the Excel file in OneDrive as shown in the following screenshot.
Whew, this tutorial is really lengthy, isn’t it?
We try to detail every crucial step along the way so that this tutorial can help friends around us to embark on the automation journey like us.
Final Note:
If this scenario needs to run periodically, then we can configure its running schedule. The configuration process is detailed in the link below:
